First Outer Rim Conflict (990 - 992 ABY)
Created by Darth Serus on Mon Oct 1st, 2012 @ 3:26am
First Outer Rim Conflict
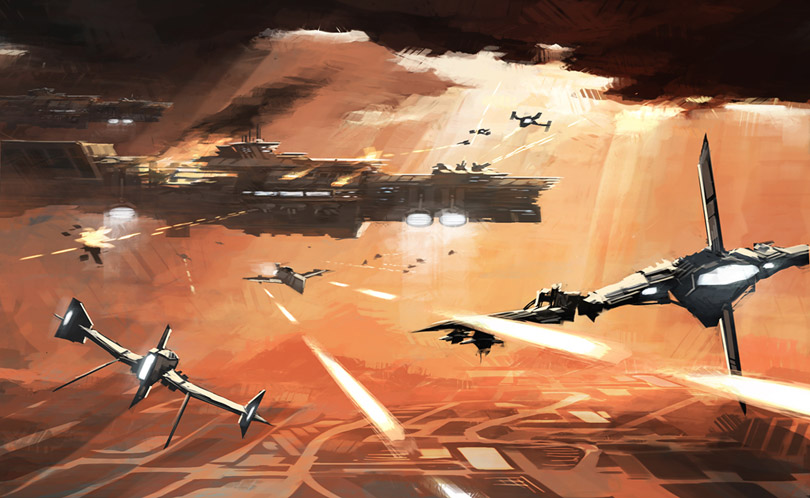
"Today, we have won more than a victory over the unwilling and uncaring Republic. Today, we won a victory against incompetence, greed and bureaucracy. Today, we won our freedom!"
– ORA Militia General Juthan, following the Defence of Cathar.
- Beginning: 990 ABY – Breaking of the Alliance Border Blockade
- End: 992 ABY – Second Battle of Alba
- Place: Trans-Hydian Region, Outer Rim Territories
- Primary theatres: Alba, Cathar, Charros, Belsmuth, Junction, Roche, Taanab and the surrounding hyperspace corridors
OUTCOME
-
Decisive Republic military victory
- Military defeat and formal dissolution of the original Outer Rim Alliance
- Disbandment of the ORA Militia and most associated planetary commands
- Capture, death or exile of much of the Alliance military and political leadership
- Restoration of former Alliance worlds to Third Republic administration
- Re-establishment of major hyperspace trade routes through the Trans-Hydian region
- Seizure or destruction of Alliance shipyards, supply depots and heavy military equipment
-
Expansion of GalactaWerks influence
- GalactaWerks Marines emerge as the Republic’s principal expeditionary force
- Large-scale deployment of GalactaWerks walkers, battle droids and military transports
- Corporate control established over damaged ports, mines, communications systems and transport infrastructure
- Beginning of the Repatriation Campaigns across former Alliance space
- Long-term consolidation of GalactaWerks security and commercial authority throughout the Outer Rim
-
Enduring political consequences
- Alliance independence is defeated, but its grievances remain unresolved
- Former ORA worlds experience prolonged military occupation and economic restructuring
- Veterans, refugees and labour movements preserve Alliance identity underground
- The brutality of the war becomes central to later Outer Rim nationalism
- The conflict lays the ideological foundations for the Second Outer Rim Conflict
| COMBATANTS | Third Galactic Republic | Outer Rim Alliance |
|---|---|---|
|
Judicial Forces GalactaWerks Marines Republic-aligned planetary defence forces Corporate auxiliary fleets Contracted transport and engineering commands |
ORA Militia Alliance Border Commands Local planetary defence forces Volunteer regiments Agricultural and industrial militias Independent privateers |
|
| COMMANDERS |
Supreme Judicial Marshal Kethryn Vaal GalactaWerks Expeditionary Director Arven Holt Commodore Jasek Morrenn, Republic Fleet Liaison General Prefect Nalia Sorn, Judicial Ground Command Superintendent Hadrik Vaul, GalactaWerks Mechanised Corps |
General Juthan Colonel Saava Rheel, Cathar Defence Forces Marshal Torvek Nall, Alliance Border Commands Air Marshal Cel Varo, Alliance Starfighter Corps Brigadier Ral Kessan, Alba Territorial Militia |
MAJOR BATTLES AND EVENTS
-
Breaking of the Alliance Border Blockade (990 ABY):
Alliance militia vessels and converted civilian carriers force passage through Republic and GalactaWerks customs lines after years of escalating trade restrictions. The engagement marks the formal beginning of open war.
-
First Battle of Alba (990 ABY):
An attempted Republic decapitation strike against the Alliance capital is repelled by orbital batteries, militia flotillas and massed fighter formations. The Republic suffers unexpectedly heavy losses and abandons plans for a rapid conclusion to the war.
-
The Charros Mudfields (990–991 ABY):
A prolonged ground campaign fought across the storm-saturated plains and industrial wetlands of Charros. Both sides construct vast trench systems beneath near-continuous artillery and walker bombardment. The front advances only a few kilometres over several months.
-
The Belsmuth Salient (990–991 ABY):
Alliance forces hold a narrow fortified corridor linking several agricultural regions to the wider ORA supply network. Repeated Republic offensives fail to break the position until GalactaWerks siege droids and subterranean engineering teams collapse sections of the defensive line.
-
The Roche Run (991 ABY):
A succession of fleet engagements and starfighter actions fought through the asteroid fields surrounding Roche. Alliance pilots exploit the terrain to destroy several larger Republic vessels, while GalactaWerks deploys automated fighter swarms to overwhelm defensive formations.
-
The Junction Offensive (991 ABY):
Republic forces launch a major mechanised assault intended to split Alliance territory and seize the principal junctions between regional hyperspace routes. The advance succeeds at enormous cost following extensive trench fighting, chemical warfare and walker engagements.
-
The Taanab Skies (991 ABY):
One of the largest sustained aerial and orbital battles of the conflict. Thousands of starfighters, atmospheric gunships and automated interceptors fight above Taanab’s agricultural belts. Casualty rates among inexperienced volunteer pilots become notorious.
-
Defence of Cathar (991 ABY):
Alliance militia and Cathar planetary forces halt a major Republic offensive despite repeated attacks by GalactaWerks walkers, heavy droids and assault transports. The victory becomes one of the defining legends of Alliance resistance, although the wider strategic situation remains unchanged.
-
The Winter of Cinders (991–992 ABY):
Republic bombardment and scorched-earth withdrawals reduce several frontier districts to contaminated wasteland. Refugee movements overwhelm neighbouring systems, while both sides accuse the other of targeting civilian agriculture and infrastructure.
-
The Alba Encirclement (992 ABY):
Republic fleets isolate the Alliance capital while GalactaWerks forces seize surrounding ports, communications stations and supply worlds. Alliance efforts to break the encirclement fail after catastrophic starfighter losses.
- Second Battle of Alba (992 ABY): The final major engagement of the war. Republic troops breach the capital’s outer defensive zones following sustained bombardment, droid assaults and close-quarters urban fighting. The Alliance government collapses and the original ORA is formally dissolved.
BACKGROUND
The First Outer Rim Conflict emerged from decades of political and economic tension between the Third Galactic Republic and a growing association of frontier worlds. These systems objected to compulsory export arrangements, GalactaWerks control of essential infrastructure, restrictions upon local tariffs and the continued concentration of political authority within the Core.
The original Outer Rim Alliance developed from a mixture of trade leagues, agricultural cooperatives, local defence compacts, labour organisations and planetary autonomy movements. Its early leaders did not uniformly seek complete independence. Many initially demanded greater control over taxation, shipping, security and public infrastructure within the existing Republic.
The Alba Congress of 968 ABY produced a common political charter, but Senate negotiations failed to achieve a comprehensive settlement. During the following decades, Republic customs restrictions and GalactaWerks commercial pressure increased, while Alliance worlds armed their convoys and expanded local militia forces.
By the beginning of the Alliance Border Emergency, both sides viewed the other as acting in bad faith. The Republic characterised the Alliance as an unlawful separatist organisation undermining interstellar commerce. Alliance leaders accused Coruscant of enforcing corporate rule through blockade, debt and political delay.
Open war began in 990 ABY when Alliance vessels broke through the border blockade and seized several inspection stations. Republic leaders initially expected the rebellion to collapse following a rapid show of force. Instead, the conflict developed into a prolonged industrial war unlike any the Third Republic had previously fought.
THE CHARACTER OF THE WAR
The First Outer Rim Conflict became infamous for combining highly advanced galactic technology with static, attritional ground warfare. Deflector shields, orbital interdiction and entrenched anti-aircraft systems frequently prevented either side from achieving decisive superiority from orbit. As a result, control of major worlds often depended upon prolonged surface campaigns.
Vast trench networks spread across agricultural plains, industrial districts, mountain valleys and ruined settlements. Some defensive lines extended for hundreds of kilometres and included underground barracks, command chambers, field hospitals, droid maintenance bays and shielded artillery positions.
Repulsorlift vehicles proved unreliable in areas saturated by electromagnetic disruption, shield interference and deliberate weather manipulation. Both sides therefore made extensive use of walkers capable of crossing cratered ground, deep mud and collapsed urban terrain. Heavy GalactaWerks machines became enduring symbols of the Republic advance, while Alliance forces employed smaller local walkers, improvised artillery platforms and captured industrial machinery.
Soldiers frequently fought for days over individual embankments, shield generators, pumping stations and transport tunnels. Positions changed hands repeatedly, only to be abandoned after sustaining losses far greater than their strategic value.
The war also saw the mass deployment of battle droids on a scale not previously attempted by the Third Republic. GalactaWerks argued that machine formations would reduce organic casualties and break fortified Alliance positions. In practice, droid warfare contributed to an escalating cycle of violence in which commanders became increasingly willing to order attacks that would have been considered politically impossible using organic troops alone.
GALACTAWERKS REAPER DROIDS
Among the most feared weapons of the First Outer Rim Conflict were the early GalactaWerks heavy attrition droids, commonly known as Reapers. Designed for trench-breaking, fortified assaults and the methodical clearance of defended ground, the machines were built to continue advancing despite catastrophic structural damage.
GalactaWerks records referred to the units through a series of model numbers and functional designations, but the name Reaper spread rapidly among Alliance troops. It reflected both their battlefield role and the agricultural character of many worlds upon which they were deployed. To frontier populations, the machines appeared as mechanical harvesters moving through farmland, trenches and ruined settlements, cutting down defenders before GalactaWerks Marines advanced behind them.
Reapers were normally deployed in small groups ahead of organic assault formations. Their purpose was to cross exposed ground, absorb defensive fire, breach fortifications and eliminate surviving troops within trench lines and bunkers.
Their armour protected central processors, power systems and primary weapons, while redundant locomotion assemblies allowed many units to continue moving after losing limbs. Alliance accounts frequently described damaged Reapers crawling through mud, wire and chemical fog after conventional battle droids would have ceased functioning.
Some models carried repeating blasters and grenade launchers, while others employed thermal cutters, breaching claws or short-range incendiary projectors for clearing enclosed positions. Their arrival was often preceded by artillery bombardment and followed by GalactaWerks infantry attacks.
Reapers proved highly effective in local assaults, but were expensive to manufacture and prone to identification failures when damaged or exposed to electronic disruption. Several incidents involved units continuing to attack surrendering soldiers, civilians or friendly personnel after losing contact with their command networks.
GalactaWerks denied that these incidents represented a systemic flaw, describing them as isolated battlefield malfunctions. Alliance veterans remembered them differently. The phrase "Reapers in the wheat" survived long after the war as a warning that GalactaWerks forces were approaching.
Although tactically effective during the First Outer Rim Conflict, the Reaper programme became one of GalactaWerks' most controversial military projects. Numerous battlefield investigations documented incidents in which damaged or isolated Reapers continued assault operations long after objectives had been secured, ceasefires declared or communications lost. Unable to distinguish surrender, retreat or civilian activity from hostile resistance, several units attacked medical personnel, engineering teams, refugees and even Republic forces attempting to recover them.
Public reaction to these incidents proved severe. Senate inquiries concluded that the delegation of lethal battlefield decisions to autonomous combat systems represented an unacceptable erosion of military accountability. Although GalactaWerks maintained that the overwhelming majority of deployments had functioned correctly and argued that the machines had ultimately saved countless Republic lives, mounting political pressure forced the programme's cancellation following the conclusion of the war.
The Republic subsequently prohibited the development and deployment of fully autonomous offensive battlefield droids capable of selecting and engaging targets without meaningful organic oversight. Surviving Reapers were dismantled, placed into secured military storage or retained for limited research purposes under strict supervision.
Despite the prohibition, the programme's underlying technologies continued to influence GalactaWerks research. Advances in redundant locomotion systems, autonomous navigation, battlefield target acquisition and damage-tolerant combat architecture were quietly preserved within classified corporate laboratories for nearly two centuries.
During the closing years of the Second Outer Rim Conflict, these technologies resurfaced in a radically different form with the introduction of the V1 Assassin Droid. Unlike the Reapers, which had been designed to break fortified trench systems through overwhelming physical force, the V1 platform emphasised speed, stealth and independent target pursuit. Equipped with advanced sensor suites and developed specifically to counter Force-sensitive opponents, the V1s became infamous for hunting Rift Jedi reconnaissance teams, battlefield detectors and isolated commanders operating behind Republic lines.
GalactaWerks publicly denied any direct lineage between the two programmes, describing the V1 as an entirely new weapons system. Military historians have generally rejected this claim. While separated by almost two centuries of technological development, both machines embodied the same underlying philosophy: that the most dangerous soldier on the battlefield was one that never hesitated, never tired, and never questioned the order to continue advancing.
CHEMICAL AND ENVIRONMENTAL WARFARE
The static nature of the ground war encouraged widespread use of chemical, biological and environmental weapons. Both sides initially employed non-lethal obscurants, industrial corrosives and riot-control agents to clear fortified positions. These measures rapidly escalated into the use of persistent battlefield toxins.
The most notorious was khelarite fog, a dense yellow-green aerosol developed from industrial mining compounds. Exposure caused severe blistering, respiratory collapse and progressive damage to the eyes and soft tissue. The fog settled into trenches, shell holes and underground chambers, remaining dangerous long after an attack had ended.
Republic forces also deployed nerve-disruptor vapours intended to incapacitate defenders by interfering with muscular control and sensory processing. Effectiveness varied considerably between species, leading to unpredictable casualty patterns. Compounds considered survivable for Humans proved fatal to several non-Human populations.
Alliance forces responded with locally manufactured agents, including fungal aerosols, acidic industrial mists and electromagnetic particulate clouds designed to damage droid processors and breathing equipment. Some Alliance chemical weapons were produced in agricultural plants or mining facilities without standardised safety procedures, causing numerous accidents behind their own lines.
Protective masks and sealed armour became standard equipment, but shortages were common among militia and civilian populations. Soldiers developed elaborate warning systems involving chemical detectors, sirens, colour flares and trained local wildlife.
After the war, both sides denied deliberate attacks upon civilian settlements. Later investigations concluded that atmospheric drift, inaccurate targeting and contaminated water systems caused casualties far beyond the immediate battlefields.
WALKER WARFARE
Walkers dominated many of the conflict’s major ground campaigns. Shield disruption and unstable terrain reduced the effectiveness of conventional repulsorlift armour, while tracked vehicles struggled in the deep mud created by bombardment and artificial rainfall.
GalactaWerks deployed towering assault walkers to carry heavy weapons across exposed ground. These machines were supported by smaller reconnaissance walkers, mobile shield generators, ammunition carriers and armoured engineering vehicles.
Alliance forces lacked equivalent industrial capacity and relied upon a wide variety of planetary designs. Agricultural lifters, mining walkers and construction machines were converted into armoured fighting vehicles. Many were crude but heavily protected, mounting weapons salvaged from starfighters or orbital defence systems.
Walker engagements were often fought at close range amid smoke, rain and electronic interference. Crews described enemy machines emerging through chemical fog only metres away, firing until one vehicle collapsed into the mud or was overwhelmed by infantry carrying magnetic mines.
The visual image of walkers crossing cratered fields beneath artillery fire became one of the defining symbols of the war. Republic propaganda presented them as engines of lawful progress. Alliance memorial art depicted them as vast corporate machines trampling farms, villages and the bodies of militia volunteers.
THE STARFIGHTER WAR
If the ground war was defined by trenches and attrition, the war above the atmosphere was defined by speed, confusion and extraordinarily high casualty rates.
Both sides relied heavily upon starfighters because neither possessed sufficient capital ships to maintain permanent supremacy across the entire Trans-Hydian theatre. Fighters were used for convoy escort, reconnaissance, atmospheric support, interception and attacks against orbital infrastructure.
The Alliance entered the war with large numbers of civilian pilots, planetary volunteers and privateers. Many flew converted patrol craft, agricultural aircraft or obsolete military fighters. Republic and GalactaWerks forces fielded better standardised machines, but their pilots were often drawn from hastily expanded training programmes.
Early engagements retained a degree of individual manoeuvre and squadron discipline. As the war continued, battles increasingly involved hundreds or thousands of craft operating within dense fields of debris, countermeasures, automated drones and overlapping weapons fire.
Fighter formations frequently broke down within minutes. Pilots became separated from their units, navigation systems failed and friendly-fire incidents became common. Life expectancy among replacement pilots during the Taanab and Alba campaigns was measured in operational sorties rather than months.
GalactaWerks introduced automated interceptor swarms intended to exhaust Alliance pilots and overwhelm defensive formations. The Alliance responded with signal decoys, improvised electronic warfare and suicide attacks against command vessels controlling the swarms.
The celebrated aces of the conflict achieved extraordinary numbers of confirmed victories, but most were killed before the war ended. Later historians questioned whether many recorded claims represented individual skill, propaganda inflation or the chaotic duplication of automated combat records.
THE CHARROS MUDFIELDS
The Charros campaign became the most enduring symbol of the war’s futility. Republic forces sought to seize a chain of industrial settlements controlling access to several Alliance supply routes. Initial bombardment destroyed the region’s drainage systems and ruptured underground reservoirs, transforming the battlefield into a vast expanse of mud, chemical runoff and cratered farmland.
Alliance defenders constructed layered trench networks protected by shield generators, mines, concealed artillery and underground transport tunnels. Republic forces answered with their own fortifications, producing a static front separated in some places by less than one hundred metres.
Repeated assaults achieved little. Walkers became trapped in mud or collapsed into shell craters. Infantry advances were halted by automated weapons, gas and artillery. Droid units crossed ground that organic troops could not, but frequently lost communication with command systems and continued attacking positions after tactical objectives had become irrelevant.
The settlements at the centre of the campaign changed hands repeatedly. By the time Republic forces secured the region, the industrial facilities they had fought to capture were almost entirely destroyed.
The phrase "another Charros" later entered common military language as a description of any campaign in which casualties and destruction bore no rational relationship to the objective being pursued.
→ Back to the Conflicts & Wars
Categories: Conflicts and Wars